Did you know? The availability of accessible, user-friendly AI tools has brought professional-level editing capabilities to non-experts. As a result, 70% of image editing software users prefer AI-powered tools over manual methods. (Source)
Well, after completing your dream journey to your favorite destination, the next step includes posting pictures on your social media accounts to emphasize your experiences.
But most of the time, due to some lighting and shooting errors, your pictures can look faded and dull in quality. However, you can significantly enhance your travel videos from simple clips to breathtaking journeys with the CapCut AI background generator, as it contains numerous optimization utilities.
That’s not it, in this blog post, we are going to cover everything about this platform to provide valuable insights to the readers.
Let’s begin!
Key Takeaways
Understanding the unique alchemy of pre-editing
Uncovering your story with the CapCut workflow
Looking at the importance of background removal
Decoding how to export your favorite picks
The Alchemy of Pre-Editing: Vision Before the Cut
Great edits are born before you even open the app. Start with a vision. What is the feeling of your travel story? Was it a frenetic, energetic city break? Want a tranquil, nature-inspired retreat or a nostalgic trip through history? Pick a theme to shape your music, pacing, and color choices. It’ll bring your random clips together into a cohesive story.
Next, gather your assets, including:
All your video clips from your phone and camera.
A fitting soundtrack. Music is the backbone of your edit. Explore CapCut’s extensive library or use your own.
Pro tip: choose your song first! Editing to the beat can be a game-changer.
Photos to add variety and highlight stunning still moments.
Voiceovers or sound effects. Did you record the sound of waves or market chatter? These authentic sounds are gold.
Intriguing Insights
This infographic shows the CapCut key highlights
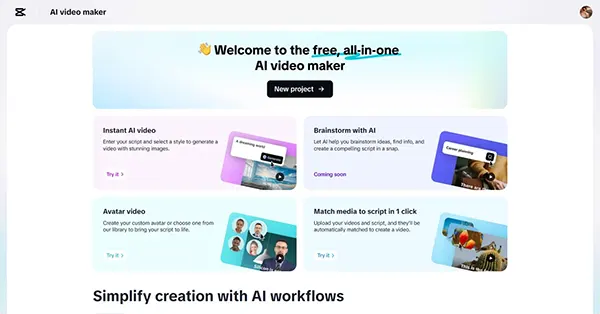
Conjuring Your Story: The CapCut Workflow
Now, the magic begins. Import your selected clips into a new CapCut project. Don’t be afraid to be ruthless. Cut anything that doesn’t serve your story.
1. Build Your Foundation: The Timeline
Drag your chosen soundtrack onto the timeline first. This establishes the flow of your entire edit. Then, arrange your best clips in a logical order. A strong opening hook (a breathtaking drone shot, a smiling face) grabs attention instantly.
2. The Art of the Cut: Pace and Rhythm
This is where the CapCut video editor shines. The key is to cut on the beat of the music. Watch your timeline; you’ll see the audio waveform. Place a cut where the beat drops or a new instrument enters. This syncs the visual energy with the audio, creating a satisfying, professional flow.
Use quick cuts for high-energy sequences. Use longer, lingering shots for emotional or scenic moments. Variety is essential.
3. Weave the Magic: Transitions and Effects
Less is often more. A well-placed transition can be incredibly powerful. With CapCut, you can choose from simple fades to dynamic zoom effects.
The “Zoom” transition is a favorite among creators right now. It adds energy and excitement to your video. Use it sparingly to connect shots that have similar motion.
Be careful not to overuse flashy effects. Let your travel moments be the focus. The effect should enhance your story, not take away from it.
4. Paint with Light: Color Grading
This is the key to achieving a “cinematic” look. Raw video often looks flat, but color grading adds depth and emotion.
CapCut’s “Adjust” and “Filters” tabs are your go-to tools. Start by correcting your clips, adjusting the brightness, contrast, and saturation to ensure everything looks good balanced.
Then, create a mood. To have a sunny beach video, warm the tones and give them a golden color. To make a mountain walk a moody one, darken the colors and darken the shadows.
You may save your own color saving as a preset. Use on every clip to create a similar signature appearance.
5. The Final Enchantments: Text, Sound, and Motion
Text & Titles: Introduce a location with some text, include dates, or write briefly. Make fonts clean and readable.
Sound Design: Lower the music volume and layer in keyframes to highlight natural sounds—like a wave crashing or laughter. This adds a layer of immersion that pure music cannot.
Smooth Movement: The “Keyframe” feature is a powerful tool. You can add subtle zoom and pan movement to still photos. This brings them to life. It’s called the Ken Burns effect, and it’s incredibly effective.
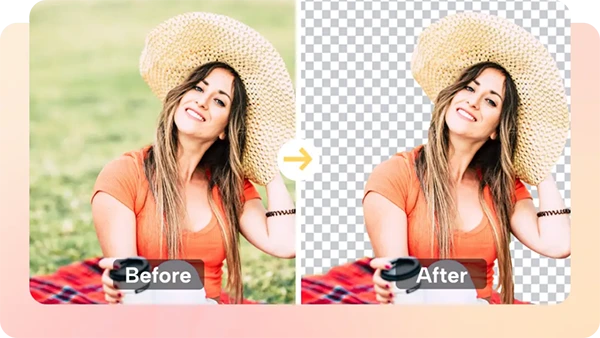
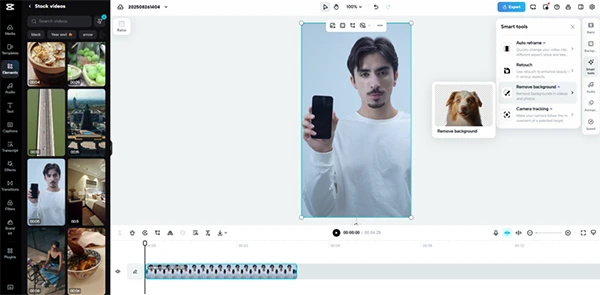
Importance of a Background Remover
A background remover is essential when dealing with moving subjects. It aids in isolating your subject and then applying new frames. CapCut Web provides proper separation without overlapping or ghosting.
The removal of the background will ensure a more seamless integration of AI-generated images. The subject isolation, combined with frame exactness, will provide you with professional clarity. This makes the tool useful for both personal and commercial material. Your images stay bright, clear, and consistent across all media.
Interesting Facts Over 50% of image editing tasks already use AI tools, a figure expected to rise to 70% by 2026. The use of AI-powered background removal tools increased by 20% in 2024 alone. (Source)
Exporting Your Masterpiece
You’ve woven the magic. Now it’s time to share it. Go to the export screen. For the highest quality, select:
Resolution: 1080p (or 4K if your footage supports it).
Frame Rate: 30fps is a great standard.
Bitrate: Higher is better for quality, but creates a larger file.
Hit export. CapCut will work its final bit of magic, compiling everything into a single, stunning video file.
Your Story Awaits
Editing is not a technical process. It is an act of storytelling. You have the opportunity to relive the adventure and spread its spirit to others. CapCut puts a professional studio in your palm.
The barrier between “footage” and “film” has never been lower. Your memories are too precious to leave buried in a camera roll. Download CapCut, import your adventures, and get started creating. Unleash the magic.
Your audience is waiting.
Frequently Asked Questions
What is the best AI background remover?
Honestly, this answer depends on your utility and demands of the project; choosing the option that aligns with them will decide the best AI background remover for you.
How to use AI to change a background?
To change the background in any advanced tool, go to File > Document Setup and click the color swatch under the “Background” section to select a new color. Then, enable the “Simulate Colored Paper” option and click OK to apply the change
How accurate are background removers?
Most of the popular platforms of this segment have a higher accuracy rate ranging between 75-90%.