- Plan around the most demanding part of the trip
- Give each storage position a clear job
- Check the bicycle before comparing advertised capacity
- Build the load for riding and for changing supplies
- Make camp routines and short stops easier
- Use a loaded rehearsal to catch expensive mistakes
- Frequently asked questions
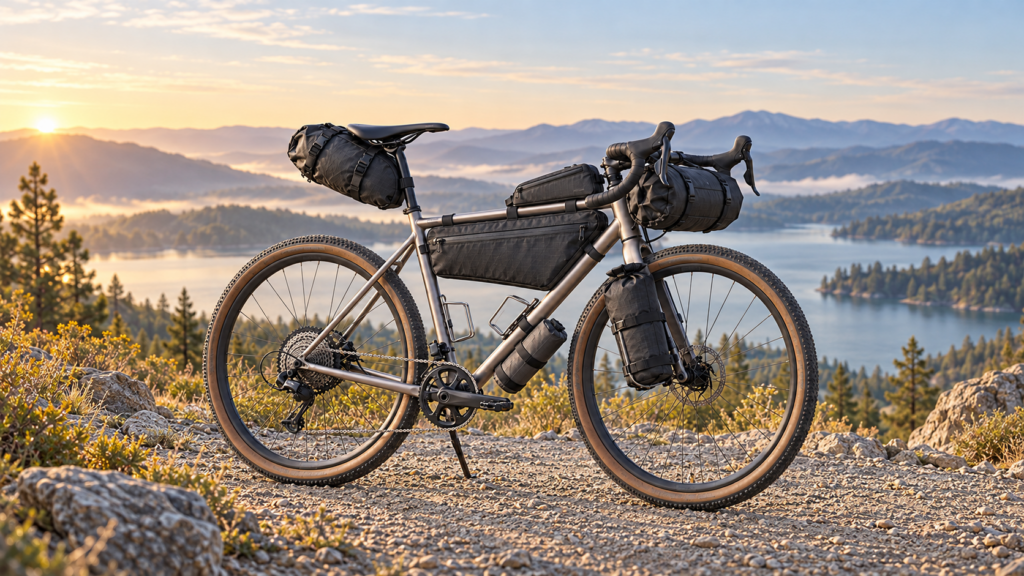
Choose bikepacking bags based on the gear you actually plan to carry and the space available on your bicycle. Once everything is packed, make sure the bike still feels comfortable and easy to handle. The length of your trip matters, but other things can be just as important, such as how much food you need to carry, how cold it may get at night, where you can refill your water, and what kind of roads or trails you will ride on. A simple setup where everything fits properly and you can easily reach the things you need is often better than having lots of storage space spread across bags that don’t fit well.
If you’re planning your first trip with several overnight stops, start with the bicycle and camping gear you already have. Lay everything out and separate the items you may need while riding from those you will only use at the campsite. This will give you a better idea of what kind of bags you need. You can then decide whether a frame bag and seat pack are enough or if you need a rack, panniers, or a few extra small bags to carry everything comfortably.
Plan around the most demanding part of the trip
Imagine two three-day rides. One goes through towns each afternoon and ends at established campsites. The other crosses a remote area with limitations of resupply. They have the same timings, yet the second needs more space for provisions. Before selecting bags, write down the biggest interval between reliable things and the equipment needed for the coldest expected overnight conditions. Estimate capacity from that load, rather than from the number of nights itself.
Differentiate important equipment from conveniences you would like to bring. An extra jacket that serves a different weather purpose is not equal to a second casual outfit. Keep the reasoning where it can be seen: what condition does each item address, and where will it be taken in use? This exercise also showcases shared equipment. Two riders may be able to divide a shelter or cooking system, not in each packing a complete copy.
Terrain helps determine the shape of the carrying system. Adventure Cycling Association shows racks and panniers as useful options when frame space is limited or extra capacity is required, while streamlined bags suit many off-pavement trips. Also treat these as options, not opposing identities. A small rider with a nicer rack may be better served by compact panniers than by a seat pack that hardly clears the rear tire.
Give each storage position a clear job
The familiar starting arrangement sees a frame bag, a handlebar bag, and a seat pack. REI identifies these things as the main bikepacking storage positions, with little bags added as required. [1] The useful question is what each position should carry on your trip. Avoid buying a complete matching set before knowing what your sleep system, food, tools, and daytime clothing will be kept.
Pack by task as well as by object size. Keep the items required to set up shelter together, so arriving in rain does not require opening every bag. Store a repair pouch where it can be taken out without spilling snacks into the dirt. A breakfast kit and an evening cooking kit may share equipment, but both should have an obvious place. Consistent locations reduce the total quantity of searching at every stop.
| Storage position | Useful role | Fit question |
|---|---|---|
| Frame bag | Compact tools and dense supplies | Can bottles still be removed? |
| Seat pack | Compressible clothing and sleeping gear | Is there clearance when fully loaded? |
| Handlebar bag | Bulky gear needed mainly at camp | Are controls and cables unobstructed? |
| Rack and panniers | Larger or less compressible loads | Are rack compatibility and heel clearance adequate? |
| Top tube or stem bag | Small items used at stops | Does it stay clear of knees and steering? |
The table is a starting allocation, not a requirement to fill every position. If your shelter fits completely in one bag, there is no benefit in throwing it simply to balance the number of items. Likewise, an empty accessory bag still adds another closure and mounting system to manage. Add storage when it makes practical access or accommodates a required load, rather than because an attachment point remains unused.
Check the bicycle before comparing advertised capacity
A bag can be the right volume and the incorrect shape. Start with measuring and a side-on photograph of the bicycle. Include the bottles and accessories you have to use. Apidura’s frame-sizing guidance specifically recommends seeing the fit with bottles and frame-mounted equipment in place. [3] This matters because a bag that fits the frame triangle on paper may not allow the path needed to remove a bottle.
Next, check the space around the handlebar and saddle. REI highlights the distance between a handlebar bag and the front tire, including what happens when a suspension fork compresses. [1] On a loaded bicycle, also turn the bars fully and check access to brakes and shifters. Follow the bicycle and bag manufacturers’ compatibility instructions, especially for suspension components, carbon parts, and dropper posts.
For brands developing a coordinated range, these fit questions belong in the design brief. Working with a bicycle bag manufacturer such as Vancharli Outdoor can also showcase specifying bag dimensions, strap locations, openings, and the intended bicycle category. Provide actual frame or rack measurements and a true equipment list. A sample should solve a stated fit problem; a generic claim that a bag suits every bicycle is not as accurate.
Build the load for riding and for changing supplies
Packing arrangement affects how a bag showcases. REI recommends keeping heavier items closer to the seatpost in a seat pack to help control movement and identifies the frame triangle as a useful location for dense equipment. [1] Beyond that starting point, check the complete bicycle. A nicely packed individual bag does not compensate for a setup that feels clumsy when you start, turn, or get out of the saddle.
Food makes this a moving target. A bag that is full after a grocery stop may be made half empty the next afternoon. Choose compression and closure arrangements that still hold the left-out contents securely. During a practice packing session, remove a day’s food and close everything again. If the bag can’t hold up into an inconvenient shape or its contents slide around, redo the packing order or the bag’s size.
Leave enough usable space to close bags as intended. Overfilling a roll-top because one more item fits inside changes the purpose of measuring capacity. Similarly, a zipper should not depend on squeezing the bag between your knees to bring its edges together. Judge capacity with the bag placed and closed, not with equipment piled above an open mouth. Follow the given load limits for the bicycle, rack, mounts, and bags.
Make camp routines and short stops easier
Think through a normal stop: park, remove a layer, find a snack, check the route, and continue. Keep those actions far away from unpacking your bedding. A small accessible pocket can be good for you when it prevents repeated opening of a large main compartment. Test it while stationary with the gloves you expect to wear. If a buckle or zipper is awkward in your driveway, it is not possible to become easier on a cold morning.
Wet equipment should have its own plan. A rain jacket used during the day should not be stuffed against the dry clothes kept aside for sleeping. Decide where damp items will go before the trip, and protect sensitive belongings according to the finished bag’s stated performance. Waterproof-looking material is not enough information. Ask how seams and closures are made and use different internal protection where the consequences of moisture would be significant.
Include the journey to the start and the trip home in your packing plan. At a station, hotel, or shuttle pickup, you may need to move the bicycle and your belongings differently. Decide which bag will hold valuables you take with you and which attachments are easy to release. Practice carrying the detached bags together. Several small bags can be ideal on the bicycle yet awkward in your hands, so a simple plan for transfers may be more valuable than another pocket or a little extra capacity.
Use a loaded rehearsal to catch expensive mistakes
Load the bicycle as if going away from a resupply stop, then take a short ride close to home. Include normal turns, gentle climbs, stops, and the surfaces you can safely test. Listen for rattles and write down anything that touches your legs or requires adjustment. Check the bags after that for movement and contact marks. The purpose is to know the problems somewhere you can change the setup as soon as possible, rather than halfway through an unfamiliar route.
Repeat the rehearsal with a simple camp routine. Take out the shelter, sleeping gear, cooking equipment, and clean clothing in the order you would use them. Then repack without spreading everything across a large indoor floor. This reveals a different kind of problem: a system may ride well but demand complete unpacking whenever you need one item. Better organization can solve that problem without buying another bag.
Frequently asked questions
Q1. How many liters do I need for three days?
Ans: There is no reliable universal figure. Start with your actual packed equipment, the largest food carry, and the room needed to close each bag. A trip using indoor accommodation can require a very different setup from camping in cold weather, even when both last three days.
Q2. Do all my bags need to come from the same brand?
Ans: No. Consistent mounting, usable access, and compatibility with the bicycle matter more than matching labels. Check each product’s instructions and assess the combined setup. Different bags can work together well when their straps, openings, and positions do not interfere with one another.
Q3. Can I use panniers for bikepacking?
Ans: Yes, when the bicycle, rack, terrain, and load suit them. They can be useful for bulky equipment or limited frame space. Consider their added width and how the bicycle handles when loaded, then verify that mounting and clearances remain suitable throughout the ride.
Q4. Should I buy a bigger bag for future trips?
Ans: Only if it can also secure the smaller load you expect to carry now. A larger bag is useful when its extra space fits the bicycle, and its compression remains effective. Otherwise, a modest additional bag for occasional trips may be easier to manage.
Q5. What should I change first if the setup feels awkward?
Ans: Check fit, attachment, and packing order before replacing everything. Identify whether the problem is movement, interference, inaccessible contents, or excess equipment. Change one factor and repeat the short test. This makes it easier to tell which adjustment actually improved the experience.
Turn the trip plan into a useful bag brief
For your next trip, build the equipment list and test the bicycle before choosing the final bags. Brands and retailers developing a collection can apply the same approach when exploring Vancharli Outdoor bicycle bags: share the riding scenario, intended bicycles, packing priorities, and mounting requirements. Those details give a custom project a clearer purpose and help turn a collection of bags into a practical carrying system.
References
[1] REI Staff. How to Choose Bikepacking Bags. REI Co-op Expert Advice. Updated December 13, 2024.
[2] Bell, Alissa. Bikepacking Gear: The Bags. Adventure Cycling Association. August 16, 2022; updated July 2026.
[3] Apidura. Frame Pack Sizing Tool. Interactive Sizing Tool Guide. n.d.